cooking, fitness, health, recipes, vegetarian

Experimenting with 5 Days of Reduced Meat Consumption

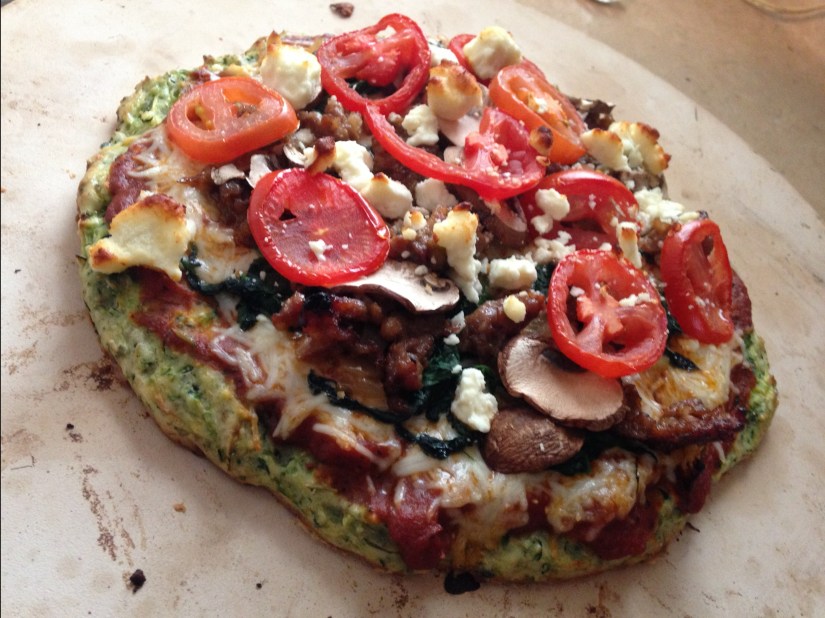
If you follow my Instagram page @cook2lean you may have noticed that I cook a lot of meat – chicken, beef, fish, lamb, eggs – pretty much all the animal-based protein I can find at my local Aldi store. It’s funny, because if I look at the accounts I follow on Instagram I am pretty sure at least 50% if not 75% of the food accounts I follow are either vegetarian or vegan accounts. I am also 100% sure that none of these accounts follow me back because of how much meat I publicly consume lol.

Anyway, although I don’t practice vegetarianism or veganism, I love seeing the different vegetarian and vegan recipes on my feed because they’re always so colorful and beautifully plated. But I never really thought of incorporating fully vegan or vegetarian meals into my daily routine until I recently went to the doctor for an annual physical.

To be honest, I thought that I was super spot on with my nutrition this past year and a half or so because all of my meals always contain at least one to two servings of vegetables. But apparently I was wrong! When I went for a check up my doctor questioned whether I took in enough fiber based on a few symptoms I described involving my digestion. She recommended that I start taking a fiber supplement to get in more fiber and reduce the issues I had been experiencing. At first I was a bit skeptical and confused – how was I NOT getting enough fiber when I am constantly making such a conscious effort to eat all these damn vegetables all the time? But as it turns out, not all vegetables are created equal in terms of fiber – when I calculated my daily average dietary fiber intake it only ended up being around 15 grams which is only about half of what is recommended for a healthy diet. And dammit, I want to be healthy! And so I started my quest to increase my fiber intake.

Being the type of person who takes a lot of pride in my health and nutrition, I wanted to avoid the need to take a fiber supplement to meet dietary needs when I could simply adjust my diet to account for more fiber. And thus, the idea to replace my meat-based lunches with plant-based lunches to increase my fiber intake was born (out of an aversion to taking pills). I found out that if I replaced 4oz of animal based protein with ½ cup of beans I’d be adding approximately an extra 7g of fiber to my daily intake. And if I added an extra serving of vegetables to my lunches and dinners I could another extra 2g of fiber, bringing me closer to the 25g my doctor was recommending. It was also really important to me that whatever I did choose to make for my plant-based lunches was still relatively high in protein to supplement my physique goals, so I decided that lentils would be a good option.

Image result for goya lentils

I found a recipe for Coconut Curried Lentils on Minimalist Baker’s website and they looked amazing – as an Indian food lover who doesn’t typically go out to get Indian food (due to food allergies – a topic I will be blogging about soon) I was excited to try out an Indian-inspired lentil recipe that would be sure to be allergen-free and packed with flavor, and this recipe didn’t disappoint at all! I decided to meal prep ½ cup of Coconut Curried Lentils with ½ cup jasmine rice and roasted broccoli and baby carrots for four days’ worth of work lunches. I typically always allow myself one day of free range for lunches in a work week so I don’t get too sick of them and I have some flexibility if a friend or coworker (or I) wanted to go out for lunch instead one day.

image1


How the week went on a plant-based lunch diet:

Note: My dinners continued to contain around 8oz animal-based protein, but overall I did reduce my meat consumption by about 20oz during this work week

Monday was my first day of trying out the coconut curried lentil lunches, and I was pleasantly surprised with not only how tasty they were, but how satisfied I felt afterwards. The extra added fiber in the lunches (along with the protein content of the lentils) really helped fill me up, but I didn’t feel overstuffed or bloated. I had expected to due to the higher carbohydrate content in my lunch (increased by about 20g from average), but I felt fine! In fact, I felt energized after eating my vegan lunch on Day 1 but that was very likely in my head due to the excitement of trying something different

Tuesday was the second day of plant-based lunches, and by the end of the day I felt EXTREMELY bloated and full from the increased fiber intake. But to be fair it was also my time of month which likely added to the bloating.

Wednesday was the third day of plant-based lunches, and while I woke up still feeling bloated from Tuesday, by mid-day I was definitely NOT bloated anymore and was completely cleared out (Sorry if TMI). My digestive system became extremely active Wednesday morning due to the increased fiber load from the past few days, but I was not complaining because one of reasons my doctor suggested increasing my fiber intake was because I was having a hard time using the restroom initially. By Wednesday I was having way too easy of a time and let’s just say me and the restroom saw each other so frequently to the point that an outsider might call our relationship clingy.

Thursday was the fourth day of having the coconut curried lentil lunches, and for the first time during a work week I was actually sad that I was on my last prepped lunch of the week! Usually by Thursday I am pretty sick of my prepped lunches and look forward to Friday to have something different because by Thursday meal-prepped meat can get pretty gross (though still edible). The lentils kept so well after four days that their flavor/texture never changed which I found really exciting – after experiencing the magic of lentils I definitely plan on prepping them again for future lunches! Very active digestion continued Thursday through Friday just an FYI.

Friday I didn’t have another lentil lunch to bring to work, but I was determined to continue the vegetarian lunch/reduced meat consumption goal for another day, so I packed a lunch of veggie-packed egg frittata and rice. It was delicious, but I would have preferred to have my lentils for an extra day instead to be quite honest! I found that I felt more tired after the egg/rice lunch than I did after the lentil/rice lunches – I’m not sure if it had to do more with the fact that I just felt burnt out from the work week in general or if perhaps my body is better at digesting beans than eggs. Either way, here are a couple bullet points to summarize what I experienced or learned during one full work week of swapping out my meat-based lunches for plant-based:

  1. I got super bloated at first but then my digestion increased SIGNIFICANTLY -after three days I stopped feeling bloated and instead felt completely cleared out 🙂
  2. Lentils are an excellent protein option for meal prep because they keep so well and don’t change in texture/flavor after a few days in the fridge, but they are not a low carb protein option by any means.
  3. That being said, increasing my carb intake by 20g+ daily didn’t make me gain weight – in fact by the end of the week I noticed a small decrease on the scale (Note: during this diet experiment I continued to keep my training in the gym very consistent/intense).
  4. You get a lot less protein from a serving of lentils than you do from a serving of chicken – because of this, I did continue to supplement with a whey protein shake in addition to my lunches (which I already been doing before – so that behavior remained constant).
  5. I felt like I had more energy and increased satiety throughout the afternoon between lunch and dinner.
  6. You can save money by going plant-based for lunches! A bag of dried lentils which actually ended up making more than enough for 8 lunches/2 people was only $4 at our local grocery store. 2lbs of chicken or ground turkey, which is what I normally use to prep 8 lunches/2 people averages about $9-10 at our local grocery store. So for half the price of our animal protein-based lunches, I was able to produce more food.
  7. I decided to go plant-based for my lunches for a second week (this week) after this experience because I liked how I felt after Week 1.

This blog post was rather lengthy and probably teetering on the edge (or falling over the edge) of TLDR, but I’d be interested in hearing from you guys! Has anyone else recently been inspired by plant-based diets and if so, what recipes have you tried or would you like to try out? Let me know.

Feel free to check out my previous blog posts, leave a comment on this blog post, follow my Facebook page, or follow my Instagram page where I post pictures of my dinner daily! Let me know if you see anything you’d like a recipe for. Until next time!


Previous blog posts:

Crispy Pan Fried Tilapia (Gluten Free)

Fresh Mango Avocado Salsa

Positive Reinforcement: Staying Motivated During Your Fitness Journey

Zucchini Crust Pizza

Weight Loss and Keeping Weight Off – What Worked (and Still Works) for Me 20+ lbs Later

Pan seared salmon with creamy cauliflower mash and sauteed brussel sprouts

My Health and Fitness Journey: Cook2Lean


cooking, health, lifestyle, recipes

Crispy Pan Fried Tilapia (Gluten-Free)

Last week I posted the recipe for my Fresh Mango Avocado Salsa pictured below. What I didn’t share with you guys last week was the recipe for the Crispy Pan Fried Tilapia that you often see me pair it with if you follow my Instagram page @cook2lean. I really look forward to this combo almost every week, so I thought it’d be unfair if I didn’t share the second half of my favorite recipe! This recipe also happens to be gluten-free thanks to the use of corn starch in place of wheat flour for the crispy coating. Corn starch can be used in place of flour for tons of recipes, so it’s a great item to have in your kitchen if you are looking to reduce gluten intake!

IMG_2689

Macro Estimates per Serving (One 6oz tilapia fillet): 37.5g protein, 7g carbs, 20g fat

Note: I say “Estimates” because I do not own or use a food scale – I based the estimated macros on a combination of the Macros app that I use, the nutrition labels, and trusty ol’ Google. Okay, that being said, let’s get started!


What You’ll Need (Serves 2):

  • 1 package tilapia (two fillets)
  • 2 tbsp corn starch
  • ¼ cup corn coil
  • Salt
  • Pepper
  • Garlic Powder
  • Paprika

Remove and rinse your tilapia fillets under cold water. Pat dry with paper towels and liberally season both sides of the fillets with salt, pepper, garlic powder, and paprika.

In a separate bowl or plate, add one tbsp corn starch. Coat one of the tilapia fillets in the corn starch (both sides). Repeat for the second fillet.

Heat ¼ cup corn oil in a frying pan on medium-high heat. Once it is HOT, add your coated tilapia fillets.

Cook for about 6 minutes each side. If needed, flip again and cook for an extra minute per side to get it real crispy.

When you’re done, remove from heat, and serve it with Fresh Mango Avocado Salsa, rice (highly recommend cooking in chicken broth instead of water for extra flavor), and your favorite veggies! This week I had paired my Crispy Pan Fried Tilapia and Fresh Mango Avocado Salsa with roasted shredded Brussel sprouts, asparagus, and onions.

Let me know if you guys try this recipe out and how it turns out for you!

Feel free to check out my previous blog posts, leave a comment on this blog post, follow my Facebook page, or follow my Instagram page where I post pictures of my dinner daily! Let me know if you see anything you’d like a recipe for. Until next time!

Previous blog posts:

Fresh Mango Avocado Salsa

Positive Reinforcement: Staying Motivated During Your Fitness Journey

Zucchini Crust Pizza

Weight Loss and Keeping Weight Off – What Worked (and Still Works) for Me 20+ lbs Later

Pan seared salmon with creamy cauliflower mash and sauteed brussel sprouts

My Health and Fitness Journey: Cook2Lean


cooking, health, recipes

Fresh Mango Avocado Salsa

If you follow my Instagram page @cook2lean you’ve probably seen this Mango Avocado Salsa featured weekly in my dinner posts, and that’s because it is one of my FAVORITE SIDES EVER! It’s so delicious, so fresh, and requires zero cooking – just slice, dice, and squeeze some raw produce and you’re pretty much done! My friend at work gave me this recipe a while back, and from the first time I tried it I was hooked (and so was my boyfriend).

IMG_2392

I initially planned on posting this on a day where I had time to also post a full recipe for an entire meal (i.e. the one pictured above – Honey Garlic Chicken recipe courtesy of Café Delites), but this fresh mango avocado salsa is so freakin’ good you can really eat it with anything – fish, chicken, with tortilla chips, alone with a spoon (lol). I like it best served with fried tilapia, but I will have to save the fried tilapia recipe for another day even though it’s what I promised in my last post, sorry guys. Our Aldi didn’t have any tilapia this week for me to buy/prepare, and I am the kind of gal who practices monogamy when it comes to Saturday grocery shopping for the most part mainly out of sheer laziness). But every now and then I “explore my options” with other grocery stores if I am feeling particularly feisty and ambitious on a Saturday. Either way, I get asked about this recipe quite often and didn’t think it was fair to keep you guys waiting just because I didn’t have tilapia on hand – so let’s get started!

Quick disclaimer: This recipe is in fact pretty high in carbs due to the natural sugar in the mango and honey – but keep in mind that all of the carbohydrates are coming from clean, natural, unprocessed food so don’t be afraid to treat yo’self with this! However, like with everything else, moderation and balance is key to maintaining a healthy lifestyle and diet. If you decide to eat this with every meal every single day, I am not sure what the outcome will be for you but it may not be “leanness,” just sayin’.

IMG_2388

Macro Estimates per Serving (1/2 of recipe): 3g protein, 55g carb, 12g fat

Note: I say “Estimates” because I do not own or use a food scale – I based the estimated macros on a combination of the Macros app that I use, the nutrition labels, and trusty ol’ Google. Okay, that being said, let’s get started!

What You’ll Need (Serves 2):

  • 1 mango, sliced and diced
  • 1 avocado, diced
  • 1 tomato or a few cocktail tomatoes, diced
  • 1/4-1/2 onion, diced (depends on how much you like onions)
  • 1/2 tbsp honey
  • lemon juice (about 1/4 lemon, squeezed)
  • salt and pepper to taste

Place the diced mango, avocado, tomato, and onion in a mixing bowl

IMG_2386

Add your honey, lemon juice, salt, and pepper

Mix it all together, and YOU’RE DONE, SON!

How easy was that?? When you’re done, serve it with your favorite protein or eat it with tortilla chips or eat it all with spoon – I don’t care how you serve it – just enjoy it! Although I do highly recommend serving it with Crispy Fried Tilapia 🙂

Let me know if you guys try this recipe out and how it turns out for you! I would like to take a moment to appreciate my friend who gave me this recipe and ultimately changed my life.

Feel free to check out my previous blog posts, leave a comment on this blog post, follow my Facebook page, or follow my Instagram page where I post pictures of my dinner daily! Let me know if you see anything you’d like a recipe for. Until next time!

Previous blog posts:

Positive Reinforcement: Staying Motivated During Your Fitness Journey

Zucchini Crust Pizza

Weight Loss and Keeping Weight Off – What Worked (and Still Works) for Me 20+ lbs Later

Pan seared salmon with creamy cauliflower mash and sauteed brussel sprouts

My Health and Fitness Journey: Cook2Lean


fitness, health, lifestyle

Positive Reinforcement: Staying Motivated During Your Fitness Journey

IMG_2069

This past year I’ve managed to build a decent amount of muscle and lose a good amount of fat due to consistent weekly weight training mixed with HIIT and some cardio, and a balanced, flexible diet – primarily consisting of unprocessed food with room for occasional treats. But staying on track with my workouts and diet occasionally requires a lot of mental energy, some weeks much more than others. Motivation comes and goes quite often, so I wanted to share with you all a few things I do to get out of a funk and back on track in the hopes that it might help someone else who may feel like their goals are out of reach even though they’ve been working their ass off for the past few months.

I personally find myself getting de-motivated in my weight loss journey every 2-3 months for a week or two, and during these weeks I feel lazy, extra hungry, depressed, and find myself feeling like I’ve made no progress even though I’ve worked so hard to look this average. These weeks usually come at a time when I’m really stressed out, like this past week (which is why I thought it might be good time to write about this topic).

For me, getting RE-motivated after a week or two of feeling like all my efforts have been for nothing, requires a LOT of self-reinforcement and reminding myself of:

  • The progress I’ve made so far
  • What I am capable of
  • What my goals are and why I am putting so much effort into my fitness goals
  • The fact that fitness itself is not an end goal but a journey that requires continued investment. 

That being said, here are 4 tips for motivation during your fitness journey:

Tip #1: Take progress pictures so you can celebrate how far you’ve come

I first started documenting the beginning of my fitness journey with pictures around January 2016, and since those first pictures were taken I’ve made a lot of progress. I only lost around 23lbs and am nowhere close to “fitness industry fit”, but my body composition changed SIGNIFICANTLY since then (fat loss, muscle gain) and more importantly my strength and endurance increased SIGNIFICANTLY. I can now do a barbell squat with 4x the amount of weight I was able to do when I first started lifting and I can now deadlift over 3.5x the amount of weight I was able to in January 2016! I can also now do 7 chin ups on a good day – in January 2016 I couldn’t do one AT ALL. I can also now run over 5-6 miles without stopping on a good day – in January 2016 it was an accomplishment to run 1 mile without stopping.

Documenting my journey’s progress with pictures has helped significantly in reminding myself how far I’ve come in my weight loss and overall health and fitness goals (which are really the most important). When I find myself doubting that I am making any progress, it’s really helpful to look at those pictures and remind myself that change doesn’t happen overnight. The below pictures were taken two years apart, and I STILL have so much progress to be made, but that doesn’t mean I shouldn’t appreciate the progress that I have made so far. If I didn’t remind myself every now and again, I definitely wouldn’t have been able to motivate myself to keep going, and I wouldn’t have made the changes that I did.

IMG_2096

IMG_2106

The pictures on the left were taken in January 2016 (@ 154-156lbs) and the ones on the right were taken this week, February 2018 (currently fluctuating between 133-135lbs). I really debated whether or not to share the above progress picture because I know that showing too much skin ultimately leads to judgement and general disapproval, and I am a little embarrassed about the fat I still want to lose in my midsection (I always wear high-waisted leggings because of this).

However, I wanted to stress that even after 1.5-2 years of eating healthy and training consistently (5-6x a week) I’m STILL not even at my “goal physique.” I think this is important to note because many people view fitness and weight loss as this “end state” that they can achieve in 4, 6, or 12 weeks. And they think that once they get to that “goal weight” their life will change and all their insecurities will just disappear with the weight loss. As a result many tend to approach fitness very unhealthily (ironically) and with a restrictive mindset because they want it to happen FAST and NOW – this is no thanks to the constant bombardment of magazines and other “fitness media” that promote this kind of approach to weight loss, which doesn’t work most of the time. Why? Because if you are restricting calories during your temporary diet to lose weight fast and then start eating normally as you were before as soon as your diet is “over” (especially without making any other changes in your life such as regularly incorporating weight training into your weekly routine to build muscle) you WILL gain back the weight. It takes SO much more time and patience to see lasting results if you are approaching it as a lifestyle change vs a temporary goal, which is why I am okay with the fact that I still have pudge, because I know that if I just continue to do what I have been doing for the past 1.5-2 years, it will go away with time.

Anyway, that was a bit of a ramble, but PROGRESS PICTURES WILL KEEP YOU MOTIVATED!

Tip #2: Try to hit a new personal record when you’ve been spinning your wheels

When I am feeling like I’m just running through the motions rather than feeling inspired to reach my fitness goals, I’ll try to reach a new personal record. In the past few months, I’ve hit new PRs on squats, deadlifts, sprints, and endurance running, and each time I’ve left the gym feeling way more excited about my next workout than I did going in. If you’re lacking motivation after a few months or weeks of consistent training, I highly recommend trying to hit some sort of new personal record to get you excited to train again. Seeing what your body is capable of because of the hard work you’ve been putting in is so rewarding and definitely helps with regaining motivation. Recently (within the past two weeks) I dragged myself to the gym and told myself that I would do at least 30 minutes of cardio and then a HIIT workout – I ended up running almost 7 miles for a full hour which is farther than I’ve ever ran in my LIFE without stopping. Seeing what my body was now capable of was so motivating that I’ve started incorporating more endurance runs into my weekly workouts lately which has really helped with leaning out!

Tip #3:Remind yourself of your overall goal – and why you are working towards that goal

When I am feeling demotivated during weight loss, I try to remind myself that my OVERALL goal is to be healthy, STRONGER, fit, capable, and HAPPY. Weight loss at this point is just an extra added benefit of achieving health, strength, fitness, capability, and happiness. Reminding myself that my reasons for wanting to get fit are a lot deeper than ONLY wanting to look good in a bathing suit makes the journey much more rewarding and the hard work worth the effort because the changes will benefit me long-term and enhance the quality of my life. During the weeks where I am not feeling motivated and I try to focus on strength gains over weight loss, I also allow myself eat at maintenance calories instead of “cutting” calories to get my body and mind feeling nourished instead of restricted again so they can have a chance to “reset” without all my hard work going to waste.

Tip #4: Remind yourself that you should just strive to be the best version of yourself – and not this idea of “perfection” that you may have in your head from someone else’s accomplishments

This past year I have found liberation in working to build myself into the best version of MYSELF and not someone else. I think it is fine to look at others for inspiration when you are working towards fitness goals but if all the work you do is for the purpose of trying to look like someone else, I promise you will never be satisfied because you and that person likely do not share the same genetics or body type. And in my experience that has lead to demotivation.

Within this past year I’ve finally accepted the fact that I naturally have an apple shaped body (heavy on top, slender lower body) and rather than wasting time wishing I was born in a different body like I used to, I embrace it now. I’ve always had broad shoulders, and I used to hate them. But now that I’ve accepted the fact that I will always have broad shoulders, I’ve chosen to enhance and tone them through weight lifting – and now I happen to like my big ass shoulders a lot and get a lot of compliments on them! I also tend to carry a lot of extra weight around my middle, so I work on training and building my back muscles to create the illusion of a smaller waist. I was also born with the unfortunate Asian Flat Butt, so since I started weight lifting consistently I make sure to work on my lower body at least once a week –  lifting heavy to build muscle and balance out my proportions so I can look like the best version of me. It’s much easier to see progress and find motivation within yourself when you start accepting and learning to work with what you have, instead of fighting it. 

If all of the above was TLDR, my tips for staying motivated are taking progress pictures, trying to hit a new personal record if you feel like you haven’t made any sort of progress, reminding yourself of your overall goal and WHY you want to achieve it, and staying focused on building the best version of yourself rather than trying to look like someone else.

This blog post was a little different from my previous ones, so please feel free to leave any feedback that could help me improve the next fitness-related post for you guys!

My next blog post will be a step-by-step recipe for Gluten-Free Pan Fried Tilapia with Avocado Mango Salsa and Jasmine Rice (featured weekly on my Instagram page). Looking forward to sharing it with you guys – in the meantime feel free to follow me on Instagram or Facebook to see more Cook2Lean posts. Until next time!

cooking, fitness, health, lifestyle, recipes

Zucchini Crust Pizza

As promised, here is a step-by-step how to recipe for Gluten Free Zucchini Crust Pizza, so you can make this delicious guilt-free pizza at home! I posted my version of this meal on my Instagram account @cook2lean earlier this past weekend. It is gluten free and a much lower-carb, healthier alternative to regular pizza because the crust is primarily made out of vegetables!

IMG_1708

A coworker of mine gave me this recipe a while back, and it is by far one of my favorite gluten free recipes for those days when I want to indulge. It is a bit of a process, but if you have the right tools it’s not too bad. I find prepping food to be relaxing on days like Saturdays when I don’t have a lot going on, so I actually had fun making these pizzas.

What I love about this recipe is how versatile it is – I personally topped my pizza with hot Italian sausage, onions, spinach, mushrooms, tomatoes, and feta cheese, but you can top it with whatever you feel like depending on your taste. I know some people like forgoing toppings altogether, so if that’s your thing, good for you! It will make your process way easier since you get to skip a step. I just happen to love all toppings.

IMG_1709


Quick disclaimer: I ended up eating an entire pizza to myself, so please be aware that once you start it’s very hard to stop.

Macro Estimates per Serving (1/2 pizza, no toppings): 19g protein, 43g carb, 13.65g fat

Note: I say “Estimates” because I do not own or use a food scale – I based the estimated macros on a combination of the Macros app that I use, the nutrition labels, and trusty ol’ Google. Okay, that being said, let’s get started!

What You’ll Need (Serves 2):

Kitchen Tools:

  • Mixing bowl
  • Cheese grater
  • Pizza stone (Prebaked at 500 degrees)
  • Parchment paper
  • Cheese cloth (preferable) OR clean tea towels if you don’t have cheese cloth, but be prepared for them to get pretty dirty if you opt to use towels instead
  • Fork, wooden spoon or spatula for mixing

Here is a video of every single thing I used during this process (minus the eggs) before I got started!

Ingredients Needed for the Zucchini Pizza Crust:

  • 3 zucchinis, grated – if you have time, allow grated zucchini to sit in a strainer for 30 minutes with some salt to help drain excess water

IMG_1678

  • 2 eggs, beaten
  • 2/3 cup gluten free flour (I used Trader Joe’s brand which is made from brown rice, potato starch, and tapioca)
  • Italian blend seasoning, 1-2 tbsp depending on how much you like oregano
  • 1 tsp salt
  • 1/2 tbsp garlic powder

Ingredients Needed for Pizza Building:

  • Pizza sauce (amount used based on preference)
  • 1/2 cup Italian blend cheese
  • Any toppings you desire. I personally used cooked hot Italian sausage, onions, mushrooms, spinach, cocktail tomatoes, and feta cheese, but I did not include those toppings in the macro count for the recipe since people like different toppings (or no toppings).

Making the Zucchini Pizza Crust

Prebake pizza stone at 550 degrees. While pizza stone is prebaking, use a cheesecloth to squeeze as much water as you can out of the grated zucchini.

Once you are tapped out from squeezing zucchini, place dehydrated zucchini in a mixing bowl with the 2 beaten eggs, 2/3 cup gluten free flour, Italian blend seasoning, salt, and garlic powder. Use a fork, spatula or wooden spoon (whatever your preference) to mix well.

Once zucchini crust ingredients are well mixed, transfer to and spread mixture on a sheet of parchment paper into a 12-14 inch diameter circular shape.

Once pizza stone is done prebaking (give it about 10-15 mins), transfer the mixture (with the parchment paper for non stick purposes) to the hot pizza stone. Let it bake for 8 minutes.

After 8 minutes, take it out of the oven (I just take the parchment paper with the crust out of the oven and leave the pizza stone in the oven) and spread the pizza sauce and cheese evenly on the crust. Put whatever toppings you are feeling at the moment, or none at all if you prefer! I happened to forget to take a picture of my raw toppings before baking because I was too excited to eat my pizza D:

Bake for another 5 minutes and remove from oven.

Allow the pizza to cool down, cut it in half (or quarters) and enjoy!

IMG_1709IMG_1711

Let me know what you guys think! Do you think you’ll try this recipe out? If so, let me know how it turns out for you!

Feel free to check out my previous blog posts, leave a comment on this blog post, follow my Facebook page, or follow my Instagram page where I post pictures of my dinners daily! Let me know if you see anything you’d like a recipe for. Until next time!